A DIY golf simulator enclosure saves $1,000 to $3,000 compared to a pre-built commercial unit at equivalent specs. A basic EMT conduit frame, impact screen, and blackout side curtains runs $400-$900 in materials. A mid-tier build using a Carl’s Place DIY kit with a quality screen runs $1,000-$2,000. Both assemble in a single weekend – the Carl’s Place kit takes about 2-3 hours with two people.
The enclosure isn’t just a cage to stop golf balls. It’s the structure that frames your projected image, blocks ambient light, and contains mishits that would otherwise destroy drywall, windows, and anything else in the room. Side misses are the most common cause of damage in home builds – which means side protection matters as much as the impact screen itself. This guide walks through the full build from measuring to mounting, with specific materials, costs, and the mistakes I see in client builds.
What you’ll need: 1-inch EMT conduit (11-14 pipes at ~$8-$12 each from Home Depot or Lowes), connector fittings ($50-$100), impact screen ($250-$600), blackout side curtains or nylon enclosure ($100-$300), ball bungees ($15-$30), pipe cutter or miter saw, hex wrench, measuring tape, step ladder. Total materials: $400-$900 for full DIY, $1,000-$2,000 for a Carl’s Place kit. Assembly time: 4-6 hours first build.
Step 1: Choose your dimensions (screen size first, frame second)
Start with the impact screen, not the frame. The screen size determines the frame dimensions, not the other way around. Most builders choose their screen based on room width and ceiling height, then build the frame 4-6 inches wider and taller than the screen on each side to allow proper bungee tension.
The most common screen sizes for home builds: 8 ft x 10.5 ft (4:3 aspect ratio) fits rooms 10-12 feet wide with 9-foot ceilings, 9 ft x 12 ft (4:3) fits rooms 13-14 feet wide with 10-foot ceilings, and 8 ft x 14 ft (16:9) fits wider rooms with standard ceilings. The 4:3 aspect ratio is the community standard because it maximizes screen height relative to width, giving you a more immersive floor-to-ceiling image.
Frame depth (front to back) is the dimension most first-timers overlook. A freestanding enclosure needs 3-5 feet of depth for stability – the deeper the frame, the less likely it is to tip forward when a ball hits the screen at 150 mph. If you’re anchoring the frame to the wall or ceiling, you can get away with 2-3 feet of depth. Budget 12-16 inches behind the screen surface for flex absorption.
Measure your room first: ceiling height to the lowest obstruction, wall-to-wall width at the narrowest point, and total depth available. Subtract 6 inches per side for clearance between the frame and the walls, and that’s your maximum enclosure width. Subtract the frame depth from your total room depth to determine how much hitting distance remains behind the frame.
Step 2: Choose your frame material
EMT conduit (Electrical Metal Tubing) is the right choice for 90% of DIY enclosure builds. It’s a zinc-coated steel tube available in 10-foot lengths at any hardware store, and it’s the same material Carl’s Place, Rain or Shine Golf, and most kit manufacturers use in their products. Strong, lightweight, affordable, and disassemblable if you ever need to move the build.
Use 1-inch EMT (trade size – the actual outer diameter is 1.163 inches). This is the standard that fits all commercially available connector fittings from Carl’s Place, A1Tarps, and Maker Pipe. Home Depot sells 10-foot lengths for roughly $8-$12 each. A full enclosure frame requires 11-14 pipes depending on size, totaling $90-$170 in pipe alone.
Connector fittings join the pipes at corners, tees, and splices. You’ll need approximately 6-8 corner fittings, 2-4 tee fittings, and 2-3 splicer fittings (if going wider than 10 feet). Carl’s Place sells complete fitting kits. A1Tarps sells individual fittings for about $8-$12 each. Maker Pipe sells a more modular connector system. Total fitting cost: roughly $50-$100.
Avoid PVC pipe. It’s cheaper ($80-$150 for a full frame) but sags significantly on spans over 6-8 feet. A 10-foot-wide enclosure with PVC top rails will bow downward under its own weight, dragging the screen with it and ruining your projected image. PVC works for small net-only frames but fails for any serious enclosure build.
Step 3: Cut and assemble the frame
Cut all EMT pipes to spec using a pipe cutter ($13-$20) for clean square cuts, or a miter saw with a metal blade for faster cuts. A pipe cutter is slower but produces cleaner edges. A miter saw is faster but throws sparks – wear eye and ear protection.
Deburr every cut end inside and out with a deburring tool or a round file before handling or fitting. This 30-second step per cut prevents expensive fabric tears during installation and use. Raw-cut EMT has sharp metal burrs that will slice through impact screen material and nylon enclosure fabric on contact.
Assembly sequence: lay out the base rectangle on the floor first. Connect sections with 90-degree elbows and 3-way corner fittings, only lightly tightening set screws initially. Build upward from the base, adding vertical supports then the top frame sections, working from back to front.
Check squareness by measuring diagonals across opposing corners. The frame is square only when both diagonal measurements are exactly equal. If they differ by more than half an inch, loosen the fittings, adjust, and re-measure. Once square and level, tighten all set screws firmly with a 1/2-inch wrench or socket.
Add diagonal braces across the upper rear corners for larger frames (10+ feet wide). These are optional but meaningfully increase rigidity and prevent the frame from racking sideways under repeated ball impacts. Drill through both pipes and bolt together, or use adjustable angle connectors from Maker Pipe.
The splicer tip: For enclosures wider than 10 feet, you’ll need to splice two pipes together for the top and bottom horizontal spans. Position the splicer joint to one side of center rather than at the midpoint – this minimizes sag on the longest unsupported span. A 16-foot-wide enclosure uses a full 10-foot pipe spliced to a 6-foot pipe, with the splice joint at the 6-foot mark.
Step 4: Mount the impact screen
The impact screen attaches to the front face of the frame using ball bungees threaded through the screen’s grommets and looped around the frame pipe. This is the universal attachment method used by Carl’s Place, SIG, and virtually every DIY builder. Ball bungees allow slight flex on impact (which reduces rebound and noise) while maintaining consistent screen tension.
If your screen doesn’t have factory grommets, install them every 8-10 inches along all hemmed edges including corners. A grommet kit costs $15-$30 and takes 30 minutes to install. Spacing is important – too few grommets creates uneven tension and visible sag between attachment points.
Screen tension is the most finicky part of the build. You want the screen taut enough to produce a flat projection surface but loose enough to absorb ball impacts without excessive rebound. Over-tensioned screens bounce balls back dangerously fast. Under-tensioned screens sag and wrinkle, ruining the projected image. Start with moderate tension on all bungees, hit a few test shots, and adjust.
Carl’s Place’s newer C-Series kits use a cabled screen system where a steel cable runs through the screen’s top hem, creating even tension across the full width. This produces a flatter, more consistent surface than grommet-and-bungee attachment on the top edge. The bottom hem brushes the floor seamlessly for a borderless look.
Add foam pipe insulation to the frame pipes directly behind the screen. If a ball strikes the frame rather than the screen (which happens on mishits near the edges), the foam protects both the frame and the ball from damage. Foam pipe insulation costs about $50 for a full enclosure and takes 15 minutes to install.
Step 5: Install side and top enclosure coverings
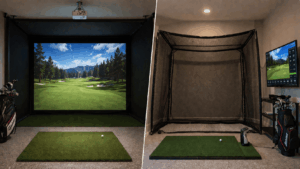
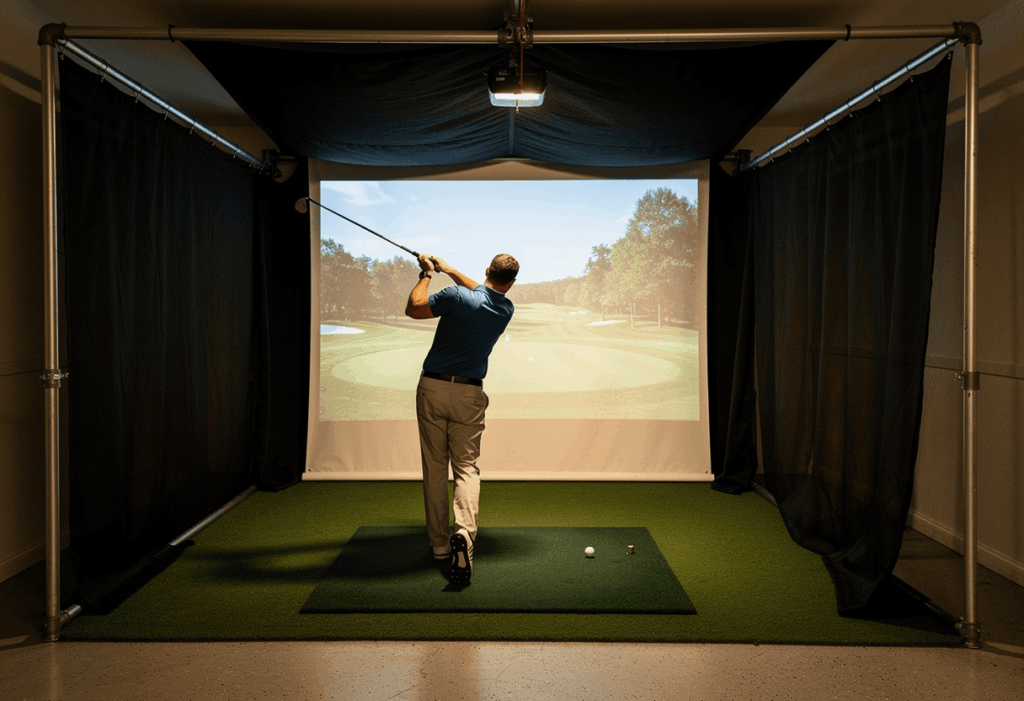
The sides and top of the enclosure serve two purposes: containing mishits and blocking ambient light. Dark, opaque fabric on the sides and top creates a focused hitting bay that dramatically improves projected image contrast. A white side wall reflecting projector light washes out the image. Black fabric absorbs it.
Heavy-duty nylon or polyester curtain fabric in black is the standard material. Carl’s Place sells pre-sized enclosure kits with side and top panels that match their frame dimensions. For full DIY, you can source blackout curtain fabric from fabric stores at $5-$15 per yard. Budget $100-$300 for side and top coverings depending on whether you buy pre-made or source your own.
Attach side coverings to the frame with zip ties, Velcro strips, or bungee loops. Zip ties are cheapest and most permanent. Velcro allows easy removal for maintenance. Bungee loops allow the fabric to flex with ball impacts. For dual-use rooms where the enclosure needs to come down periodically, Velcro is the best choice.
Don’t skip the ceiling baffle. High wedge shots and topped irons travel upward and can clear the screen entirely, hitting the ceiling, lights, or sprinklers. A nylon ceiling panel stretched across the top of the enclosure catches these shots. Carl’s Place sells ceiling baffles as add-ons. DIY builders can use archery netting or heavy-duty nylon.
Step 6: Add finishing touches
Foam pipe insulation on all exposed frame edges protects clubs, hands, and the screen from contact damage. Cover every pipe that’s within reach of a club swing or that sits behind the screen surface. Total cost: about $50. Total time: 15-20 minutes.
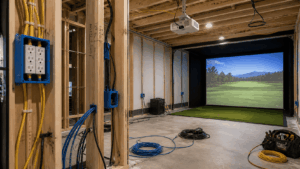
Cable management should be planned during the build, not after. Route HDMI and power cables along the frame pipes using cable ties or conduit clips. If the projector is ceiling-mounted behind the enclosure, the HDMI cable runs from the PC along the ceiling, down the rear frame post, and across to the PC position. Clean routing looks professional and protects cables from damage.
Net wall extensions behind the sides of the enclosure catch balls that ricochet sideways off the screen. Not every build needs them, but if your enclosure is in a garage with vehicles parked nearby or a basement with finished walls, side nets add a meaningful safety layer for $50-$150.
The DIY enclosure mistake I see most often: builders who skip the deburring step and tear their brand-new $400 impact screen on a raw-cut pipe edge during installation. Thirty seconds of filing per cut prevents a $400 screen replacement. Every single cut. No exceptions. Deburr everything.
DIY vs. kit vs. pre-built: the real cost comparison
Full DIY (source everything yourself): $400-$900 total. You buy EMT from the hardware store, connector fittings from A1Tarps or Maker Pipe, an impact screen from Carl’s Place or Amazon, and blackout fabric for the sides. Maximum flexibility on dimensions. Requires the most measuring, cutting, and problem-solving. Assembly: 4-6 hours.
DIY kit (Carl’s Place, Rain or Shine Golf): $1,000-$2,000 total. You get the impact screen, connector fittings, side enclosure, and instructions pre-packaged. You source and cut the EMT pipes yourself (or add the pipe framing kit for $200-$400 more). Dimensions are pre-calculated. Assembly: 2-3 hours with two people.
Pre-built commercial (SIG10, SIG12, SwingBay): $3,000-$5,000 total. Everything arrives pre-cut, pre-labeled, and ready to assemble. Screen, frame, side enclosures, ceiling baffle – all matched. Assembly: 1-2 hours. You’re paying $2,000-$3,000 extra for the convenience and the guarantee that everything fits.
For first-time builders, I usually recommend the Carl’s Place DIY kit. It splits the difference: you save $2,000+ compared to SIG, you get pre-calculated dimensions that eliminate measurement errors, and the build is forgiving enough that your first attempt works. Full DIY saves another $500 but requires more confidence with a pipe cutter and tape measure.
Common mistakes to avoid
1. Using PVC pipe for spans over 8 feet
PVC sags under its own weight on long horizontal spans. A 10-foot-wide PVC top rail bows 1-2 inches at the center, pulling the screen with it. Use EMT conduit for any enclosure wider than 8 feet. EMT is slightly more expensive but doesn’t sag, doesn’t flex under ball impact, and produces a flat, stable screen surface.
2. Skipping the deburring step
Raw-cut EMT has sharp metal burrs on every cut edge. These burrs slice through impact screen fabric and nylon enclosure material on contact. Deburr every cut end inside and out before handling or fitting. A $5 deburring tool saves you from replacing a $400 screen.
3. Over-tensioning the impact screen
A drum-tight screen looks flat and projects well, but it bounces balls back at dangerous speeds. The screen needs enough slack to absorb ball energy. Start with moderate bungee tension, hit 10 test shots, and adjust. The ball should rebound gently to your feet, not rocket back at your shins.
4. Forgetting the ceiling baffle
High wedge shots and topped irons travel upward and can clear the screen entirely. Without a ceiling baffle, these shots hit ceiling lights, sprinklers, drywall, or the projector. A $50-$100 ceiling net or nylon panel prevents hundreds of dollars in ceiling damage.
5. Not checking squareness before tightening
An out-of-square frame produces an out-of-square screen, which produces a trapezoidal projected image that requires heavy keystone correction. Measure diagonals before tightening any fittings. Equal diagonals = square frame. Unequal = adjust before you commit.
Frequently asked questions
How much does a DIY golf simulator enclosure cost?
Full DIY with sourced materials: $400-$900. DIY kit from Carl’s Place: $1,000-$2,000. Pre-built commercial enclosure: $3,000-$5,000. The DIY route saves $1,000-$3,000 compared to pre-built at equivalent specs. Materials are available at any hardware store.
What size EMT conduit do I need?
1-inch EMT (trade size, actual outer diameter 1.163 inches). This is the universal standard that fits all commercially available connector fittings from Carl’s Place, A1Tarps, Maker Pipe, and Rain or Shine Golf. Available at Home Depot and Lowes in 10-foot lengths at roughly $8-$12 each.
How long does it take to build a DIY enclosure?
A Carl’s Place DIY kit assembles in 2-3 hours with two people. Full DIY with sourced and cut materials takes 4-6 hours on a first build. Subsequent disassembly and reassembly (for dual-use rooms) takes 30-60 minutes once you’ve done it before.
Can I build an enclosure without a kit?
Yes – thousands of builders do. Source 1-inch EMT from a hardware store, connector fittings from A1Tarps or Maker Pipe, an impact screen from Carl’s Place or Amazon, and blackout fabric for the sides. The savings over a kit are roughly $300-$500. The trade-off is more measuring, planning, and problem-solving on your part.
How deep should a golf simulator enclosure be?
3-5 feet for freestanding frames, 2-3 feet for wall or ceiling-anchored frames. The depth provides stability against ball impacts and creates space behind the screen for flex absorption. Budget 12-16 inches between the screen surface and any wall behind it.
What’s better: EMT conduit or wood framing?
EMT for most builds. It’s disassemblable, lightweight, affordable, and portable. Wood framing is better for permanent installations anchored to walls and ceiling joists, where the frame becomes part of the room structure. Wood is heavier, harder to modify, and can’t be disassembled without damage.
In summary: the enclosure is easier than you think
A DIY golf simulator enclosure is one of the most approachable home improvement projects in this hobby. EMT conduit cuts with a $13 pipe cutter, connects with hex-wrench fittings, and assembles into a rigid frame that rivals commercial products at a fraction of the cost. The impact screen attaches with ball bungees. The side curtains attach with zip ties. None of this requires special skills or expensive tools.
The one thing that separates successful DIY builds from frustrating ones: measure twice, deburr everything, and check squareness before tightening. Those three habits, applied consistently through a 4-6 hour build day, produce an enclosure that looks professional, protects your room, and displays a projected image cleanly for years.
One angle most enclosure guides skip: plan for screen replacement from day one. Impact screens are consumables that wear out in 2-5 years. Build the frame with bungee attachment (not permanent fastening) so you can swap the screen in 30 minutes when the strike zone wears thin. Builders who permanently attach their screen with screws or glue end up rebuilding the entire front face when replacement time comes. Bungees make screen swaps trivial.
The most satisfying client build I watched last year was a first-timer who’d never cut a pipe in his life. He ordered a Carl’s Place DIY kit, bought the EMT from Home Depot, borrowed a pipe cutter from a neighbor, and built the entire enclosure in his garage on a Saturday afternoon with his 14-year-old son. Total time: 4 hours including breaks. The enclosure is still standing, still square, and still getting used 4 nights a week. If a first-timer and a teenager can do it in an afternoon, you can too.