Building a DIY golf simulator typically saves $1,500 to $3,000 compared to a pre-built package at the same component tier. The trade-off is 8-15 hours of assembly time and the responsibility for choosing components that actually work together. Done right, you end up with a setup that’s customized to your exact room and dollar-for-dollar competitive with commercial installs.
I’ve walked dozens of clients through their first builds, and the same lesson comes up every time: the order of operations matters more than the components. Buyers who measure first and buy second build successful sims. Buyers who buy first and measure second end up returning equipment and rebuilding rooms. This guide walks the right sequence, with specific products and prices verified for 2026.
What you’ll need: A room with minimum 9 ft ceilings, 10 ft width, 16 ft depth. Budget $3,500-$10,000 for a quality build. Time commitment: 8-15 hours of assembly across one or two weekends. Skills needed: basic measuring, drilling, and patience for projector calibration.
Step 1: Measure your space before buying anything
This is the single most important step, and the one most buyers skip. Measure ceiling height, width, and depth in the exact spot you’ll hit from – not the room average. Ceilings sag. Garages slope. Basements have soffits and ductwork that aren’t obvious until you take a backswing.
The painter’s-tape test takes 15 minutes and prevents the most expensive mistake in this hobby. Stand in your intended hitting position with your driver. Take a slow, full backswing and have someone mark the highest point of the clubhead on the ceiling. Add 9 inches of clearance. That number is your real required ceiling height, not the floor-to-drywall measurement.
Minimum dimensions for a functional build: 9 ft H x 10 ft W x 16 ft D. Comfortable standard: 10 ft H x 14 ft W x 18 ft D. If your room comes up short on ceiling, you’re either restricted to irons and wedges or shopping for a different room entirely. Width and depth have workarounds. Ceiling does not.
Step 2: Choose your launch monitor (this drives everything else)
The launch monitor is roughly 40-60% of your total budget and dictates which simulator software you can run, how much room depth you need, and what your data ceiling looks like. Pick this first – everything else flows from it.
For budget builds under $3,000 total: Garmin Approach R10 ($499) if you have 18+ feet of depth, or SkyTrak+ ($1,995 post-price-cut) if you’re tighter on space. The R10 is radar-based and needs the room. The SkyTrak+ is camera-based and works in 15-16 feet.
For mid-tier builds in the $5,000-$10,000 range: Bushnell Launch Pro ($2,499) is the community consensus pick. Camera-based, GSPro-compatible, accurate enough that most home buyers stop here. The FlightScope Mevo+ in clearance ($1,099-$1,499) is the dollar-for-dollar value play if you can find one in stock.
For premium builds at $12,000+: Foresight GC3 ($7,500) or Uneekor EYE XO2 (~$9,000-$10,000) deliver near-Trackman accuracy at a fraction of the price. Both support GSPro, E6 Connect, and TGC 2019 natively, which Trackman doesn’t.
Verify software compatibility before you buy. Trackman doesn’t run GSPro. Rapsodo MLM2PRO doesn’t run any major simulator platform. The Garmin R10 only connects to GSPro through a third-party bridge. These are dealbreakers nobody catches until after the box arrives.
Step 3: Build or buy your enclosure
You have three real options here, ranked by cost and complexity. Skipping the enclosure entirely with a basic golf net ($200-$400) is the cheapest path. You lose the visual sim experience but you contain the ball – good enough for pure data practice with the launch monitor’s app on a tablet.
The DIY enclosure route is where most builders save real money. Carl’s Place sells DIY enclosure kits ($800-$1,500) with EMT conduit frames, impact screens, and side baffles. Assembly takes 4-6 hours the first time. The community alternative is sourcing your own EMT pipes from a hardware store and ordering just the impact screen separately – this can drop the total to $500-$700 if you’re patient and handy.
The pre-built turnkey enclosure from SIG10 or SIG12 packages ($3,599-$3,999) is the no-thinking path. Frame, screen, side baffles, all pre-cut and labeled. Assembly drops to 2-3 hours. You pay roughly $2,000 more than DIY for the convenience and a more polished final look. For first-time builders, this is often worth it.
Step 4: Pick the right projector for your room
Short-throw is not optional for most simulator rooms. A standard-throw projector needs 10-15 feet of distance behind the golfer, which almost no one has. You’ll either cast a shadow on every shot or run out of room entirely.
For budget builds, the BenQ TH671ST ($700-$900) handles screens up to 10 feet wide in controlled lighting. 1080p, 3,000 lumens, throw ratio 0.69-0.83. This is the best-selling projector in the category and a reasonable starting point.
For mid-tier builds, the BenQ TK710STi (~$1,500) is the 2026 community standard. True 4K UHD, 3,200 lumens, golf mode, ceiling-mountable behind the hitting position. If you can stretch the budget here, do it – the image quality difference at 1080p vs 4K on a 130-inch screen is meaningful.
For premium builds, the BenQ LK936ST ($3,500-$4,000) is a laser unit purpose-built for golf simulation. 5,100 lumens handles ambient light that washes out cheaper projectors, and the laser eliminates lamp replacements.
Throw ratio matters more than brightness: Calculate your required throw ratio (distance from screen / screen width) before shopping projectors. Most simulator rooms need 0.69-0.89. Buying a projector with the wrong throw ratio means it won’t fill your screen from your mounting position.
Step 5: Don’t skimp on the hitting mat
This is the component your body touches on every single swing, and the one I see clients underspend on most. A $150 foam mat transmits shock straight to your wrists and elbows, and after a few hundred swings you’ll feel it. The r/golfsimulator community is blunt about this: cheap mats end careers.
The Country Club Elite at $200-$350 is the mid-tier default. Firm, realistic feedback, accepts real wooden tees. The Fiberbuilt 4×7 Studio Mat at $949 is the long-term community recommendation – rated for 300,000+ swings and designed for joint protection. If you’re hitting more than 50 balls a week, spend the extra here.
Budget builders can get away with the Net Return Pro Turf or similar combo mat at $300-$500, which doubles as both hitting and landing surface. Whatever you choose, test that it accepts real tees if you care about driver realism – many cheap mats only work with rubber tees.
Step 6: Set up your gaming PC and software
Most serious simulator software runs on Windows PC only. The minimum spec for GSPro at 1080p is an Intel i7, 8GB RAM, and an Nvidia RTX 3060. A pre-built gaming PC at this spec runs $900-$1,100. For comfortable 4K gameplay, step up to an i9, 16GB RAM, and an RTX 3080 – approximately $1,900 in early 2026.
Software choice matters as much as the hardware. GSPro at $250/year is the community consensus pick: 4,000+ courses, the Sim Golf Tour competitive tournaments, widest launch monitor support. E6 Connect ($300-$600/year) has more polished licensed courses like Pebble Beach. TGC 2019 (~$900 one-time purchase) gives you the largest user-created course library.
The Garmin R10, Rapsodo MLM2PRO, and FlightScope Mevo all work with iPad as an alternative to a Windows PC, which can save $1,000+ on the build. The trade-off is a less immersive experience and limited software options – iPad-based setups don’t run GSPro, period.
Step 7: Mount, calibrate, and test
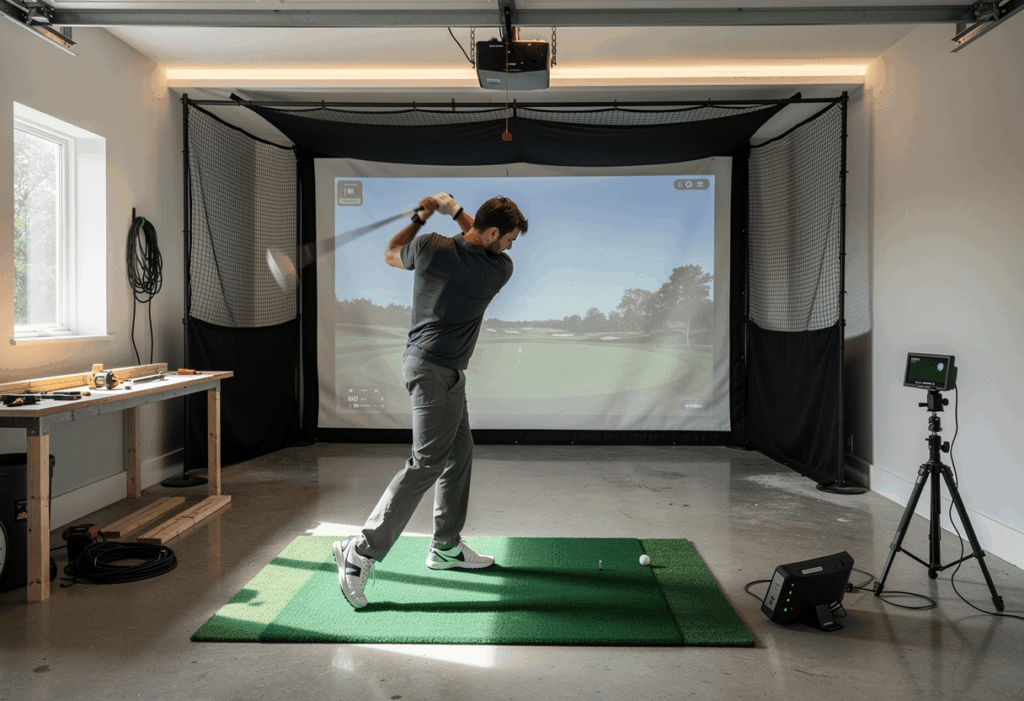
Once components arrive, the assembly sequence is: frame first, screen second, mat third, projector fourth, launch monitor last. Don’t skip steps or work out of order – you’ll end up with cable runs that don’t reach or projector alignments that fight your enclosure.
Frame assembly takes 2-6 hours depending on whether you went DIY or pre-built. Mount the screen with even tension – a sagging screen creates rebound issues and image distortion. Lay down the hitting mat and any landing turf, then ceiling-mount the projector behind your hitting position with HDMI and power runs cabled cleanly.
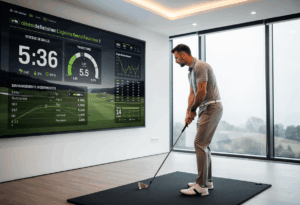
Launch monitor placement is the most fiddly part. Camera-based units like the Launch Pro need to sit a specific distance behind the ball (typically 12-16 inches) and be perfectly square to the target line. Ceiling-mounted units like the Trackman iO or Uneekor EYE XO need precise alignment from above. Take your time here – bad alignment means bad data, which makes the whole sim worthless.
Calibration takes another 30-60 minutes. Run through the launch monitor’s setup wizard, hit a few test shots with each club, and verify the carry distances against what you know your real numbers should be. If your sim 7-iron carries 195 yards, something is misconfigured – work backward through tee height, ball position, and launch monitor placement until the numbers make sense.
The mistake I see in 80% of first builds: cables run after the fact, looking like spaghetti. Plan the cable routing during the frame build, not after. Run HDMI inside the conduit, route power along the same path, and label everything. The clean look matters because a sloppy install reads as temporary – and temporary installs get used less.
A complete sample DIY build at $7,500
Here’s exactly what I’d buy today for a mid-tier DIY golf simulator build that holds its own against $20,000 commercial installs from a decade ago. All prices verified for early 2026.
Bushnell Launch Pro at $2,499. Carl’s Place DIY Enclosure Kit at $1,200. BenQ TK710STi 4K projector at $1,500. Fiberbuilt Studio mat at $949. Pre-built gaming PC at $1,100. GSPro annual subscription at $250. Cables, mounting hardware, and incidentals at $200. Total: roughly $7,700 all-in.
This setup gives you GSPro’s full course library, tour-grade ball data accuracy, true 4K projection, and a mat that protects your joints over thousands of swings. It assembles in one or two weekends and lasts 5+ years before any major component swaps. For 8 out of 10 home buyers, this is the right build.
Common mistakes to avoid
1. Buying components before measuring the room
The single most expensive mistake in this hobby. A radar launch monitor needs 18-20 feet of depth – if your room is 14 feet deep, the unit won’t work properly and you can’t fix it. Measure ceiling, width, and depth in the exact hitting position before opening any tabs on retailer sites.
2. Underspending on the mat, overspending on the projector
Buyers pour money into 4K laser projection then put a $150 foam mat under their swing. Spend $500-$950 on the mat before you spend $3,500 on projection. Your elbows and wrists will thank you, and the simulator will still get used three years from now.
3. Forgetting cable management during the frame build
Plan HDMI, power, and USB runs as part of the enclosure assembly. Routing them after the screen is mounted means visible cables, longer runs than necessary, and a sloppy final look that makes the whole installation feel temporary.
4. Choosing a launch monitor that doesn’t run your preferred software
Trackman doesn’t support GSPro. Rapsodo MLM2PRO doesn’t support any major sim platform. The Garmin R10 needs a third-party bridge for GSPro. Verify software compatibility before purchasing the launch monitor, not after – this is the most common post-purchase regret in the community.
5. Skipping room prep (electrical, ceiling, acoustics)
A dedicated 20-amp circuit for the projector and PC prevents trips and protects expensive electronics. Acoustic panels reduce the noise of golf balls hitting the screen at 150 mph. Ceiling reinforcement is necessary if you’re mounting an overhead launch monitor. Budget $500-$1,500 for room prep on any serious build.
Frequently asked questions
How long does it take to build a DIY golf simulator?
Plan for 8-15 hours of assembly time spread across one or two weekends. DIY enclosure builds take 4-6 hours, projector mounting and calibration takes 2-3 hours, launch monitor setup takes 30-60 minutes, and cable management/finishing touches eat the rest. First-time builders should add another 2-3 hours for figuring things out as you go.
Can I build a golf simulator for under $2,000?
Yes, but with real compromises. A Garmin R10 ($499), basic net and mat ($400), budget projector ($700), and either a tablet or existing laptop totals roughly $1,800. Accuracy is limited indoors, the sim experience is basic, and putting/short game data is unreliable. Functional for casual practice, not for serious improvement.
What’s the best DIY golf simulator package?
For most home buyers, the Bushnell Launch Pro + Carl’s Place enclosure + BenQ TK710STi + Fiberbuilt mat + GSPro combination at roughly $7,500-$8,000 hits the sweet spot. Tour-grade accuracy, GSPro’s full course library, joint-friendly mat, true 4K projection, and 5+ years of useful life before major component upgrades.
Do I need a gaming PC for a golf simulator?
For GSPro, E6 Connect, and TGC 2019 – yes, you need a Windows PC with at minimum an Nvidia RTX 3060, 8GB RAM, and an i7 processor. iPad-based simulators like Garmin R10, Rapsodo MLM2PRO, and FlightScope Mevo work without a PC but offer fewer software options and a less immersive experience.
How much can I save building DIY vs. buying a package?
A DIY build typically saves $1,500-$3,000 compared to an equivalent pre-built package at the same component tier. The trade-off is 8-15 hours of assembly, research time, and the risk of choosing incompatible components. For first-time builders, the package premium is often worth it for the support and compatibility guarantees.
Can I build a golf simulator in a garage?
Yes – garages are one of the most common build locations. The ideal two-car garage is 14 ft wide x 20 ft deep x 10 ft ceiling. Watch out for garage door tracks running parallel to your swing plane (a full driver backswing can clip them) and plan for temperature control in cold climates – launch monitor accuracy degrades meaningfully below 50°F.
In summary : build for usage, not for specs
The best DIY golf simulator isn’t the one with the highest-end components. It’s the one in a finished, dedicated space that you actually use four times a week. Every fitting client who built thoughtfully and matched components to their real room ends up happier than the one who bought the most expensive launch monitor and tried to make their unfinished garage work.
One thing rarely covered in build guides: plan a phase-two upgrade path before you finalize phase one. Most builders end up swapping the projector or launch monitor within 18 months as their needs evolve. Choose components that retain resale value – Foresight, Bushnell, and Uneekor units all hold 60-70% of new pricing on the used market – so you’re not stuck eating depreciation on a unit you’ve outgrown.
And buy in October or November if you can wait. Manufacturer clearance sales, Black Friday discounts, and the start of the indoor season all align in late fall. Buying in March means paying full price and losing the months when the simulator delivers the most value.
Document your build with photos at each stage. Not for vanity – for troubleshooting. When something stops working in year two and you can’t remember how the cables were routed or which mounting bracket holds what, those photos save hours of disassembly. The clients who document end up with simulators that get repaired, not abandoned.